".... Ive recently just bought a mac and have no idea how to burn cd/dvds.
What program do i use?"
What program do i use?"
The process couldn't be easier. For this tutorial, you will need a blank DVD-R or DVD-RW.
Before you get started, you should first check to assure that your Mac has a drive capable of burning DVD discs. Chances are good that it does.
Before you get started, you should first check to assure that your Mac has a drive capable of burning DVD discs. Chances are good that it does.
The majority of recent Apple computer's were manufactured with Apple's Super Drive burners, which are capable of burning both CDs and DVDs. However, Apple did sell some computer's that had a Combo Drive, which was only capable of burning CDs.
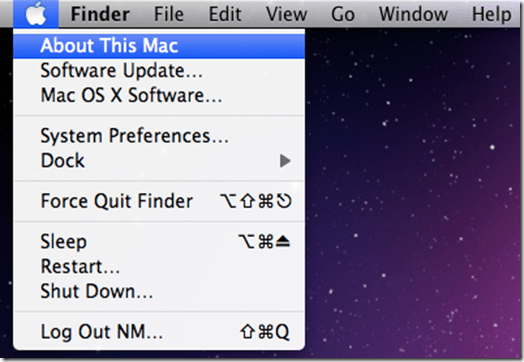
To check to see what kind of drive you have, start by clicking the Apple logo in the upper left hand corner of the screen. Select the first option, About This Mac, from the drop down menu.
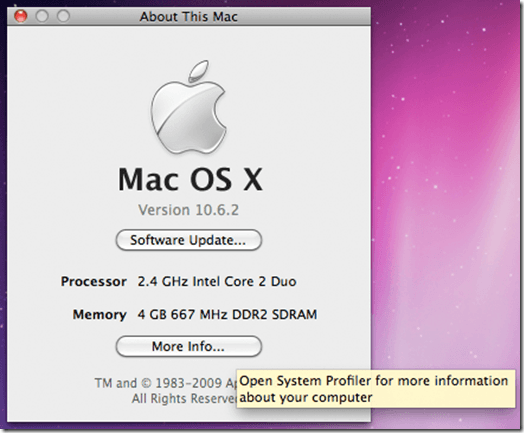
The About This Mac window should now be open. Click the More Info… button to open up the system profiler. Once the system profiler opens up, select Disc Burning from the left hand side Hardware drop down menu.
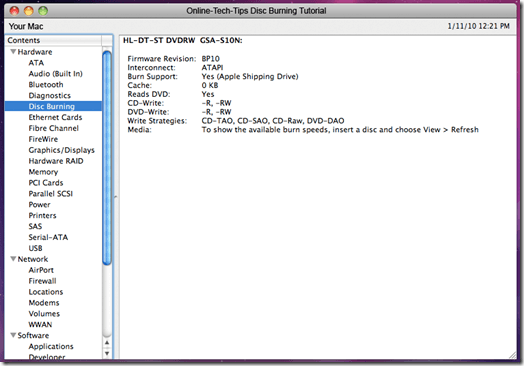
This should bring up information about your Mac's drive. Look for the section that looks like this:
CD-Write: -R, -RW
DVD-Write: -R, -RW
Write Strategies: CD-TAO, CD-SAO, CD-Raw, DVD-DAO
If you see the DVD-Write part, your Mac is capable of burning DVDs.
CD-Write: -R, -RW
DVD-Write: -R, -RW
Write Strategies: CD-TAO, CD-SAO, CD-Raw, DVD-DAO
If you see the DVD-Write part, your Mac is capable of burning DVDs.
Now, on to the DVD burning. Start by creating a new burn folder on your Mac's desktop. To do so, right click in some empty space on the desktop and select New Burn Folder from the quick menu.
If you do not see an option for New Burn Folder, you are probably running Snow Leopard. If this is the case, just select New Folder instead. Rename the folder to your liking.
If you do not see an option for New Burn Folder, you are probably running Snow Leopard. If this is the case, just select New Folder instead. Rename the folder to your liking.
Go ahead and insert your blank DVD into your Mac's Super Drive, if you have not yet done so.
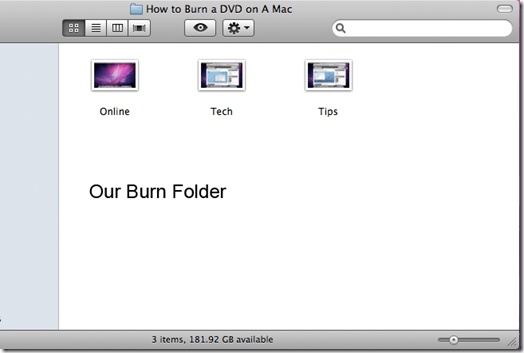
It's now time to add some content to burn to the DVD. Locate a file/files that you would like to put on the DVD. If you are using a standard recordable DVD, you will be able to add up to 4.5GB of information.
Add your files to the folder that you just created by dragging them over the folder, and dropping them in. After you have your files added, double click the folder to open it up.
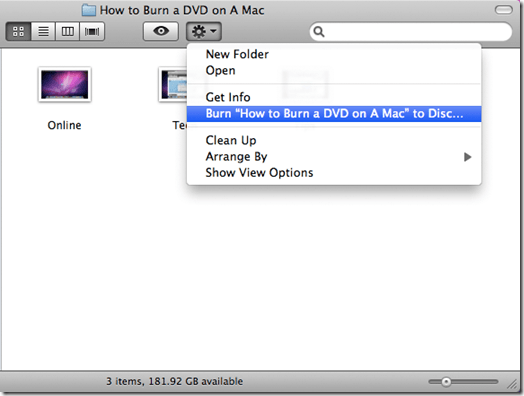
The final step to burning a DVD on a Mac is to start the burn. If you are using Snow Leopard, click the icon that looks like a gear, from within the folder, to activate the drop down menu. Select Burn “Your folder name” To Disc from the drop down menu.
If you are using an earlier version of OS X, such as Tiger, you should have created a burn folder rather than a regular folder. To start burning your DVD, simply click the Burn button, located in the upper right hand corner of the window.
If you are using an earlier version of OS X, such as Tiger, you should have created a burn folder rather than a regular folder. To start burning your DVD, simply click the Burn button, located in the upper right hand corner of the window.
That's all there is to it. Now all you have to do is wait for your DVD to finish burning. That's how you burn files to DVD on a Mac.
From: http://www.online-tech-tips.com/mac-os-x/burn-dvd-mac-os-x/
If your mac did not have this function, or your video is not supported, you can use DVD Maker for Mac, it also has the same function, and it supports importing dv, wmv,3gp, mov, vob, mpg, asf, flv, avi, rm, rmvb, mp4, mkv, mka, m4v, ac3, tod, mod movie formats to output DVD for DVD 5 and DVD 9 Disk. Before burning to DVD it back up trim the imported video, amazing Customizable Menu Templates and direct preview.
You can see the how to burn video to dvd with dvd creator for lion.
You can see the how to burn video to dvd with dvd creator for lion.
No comments:
Post a Comment